···
Log in / Register

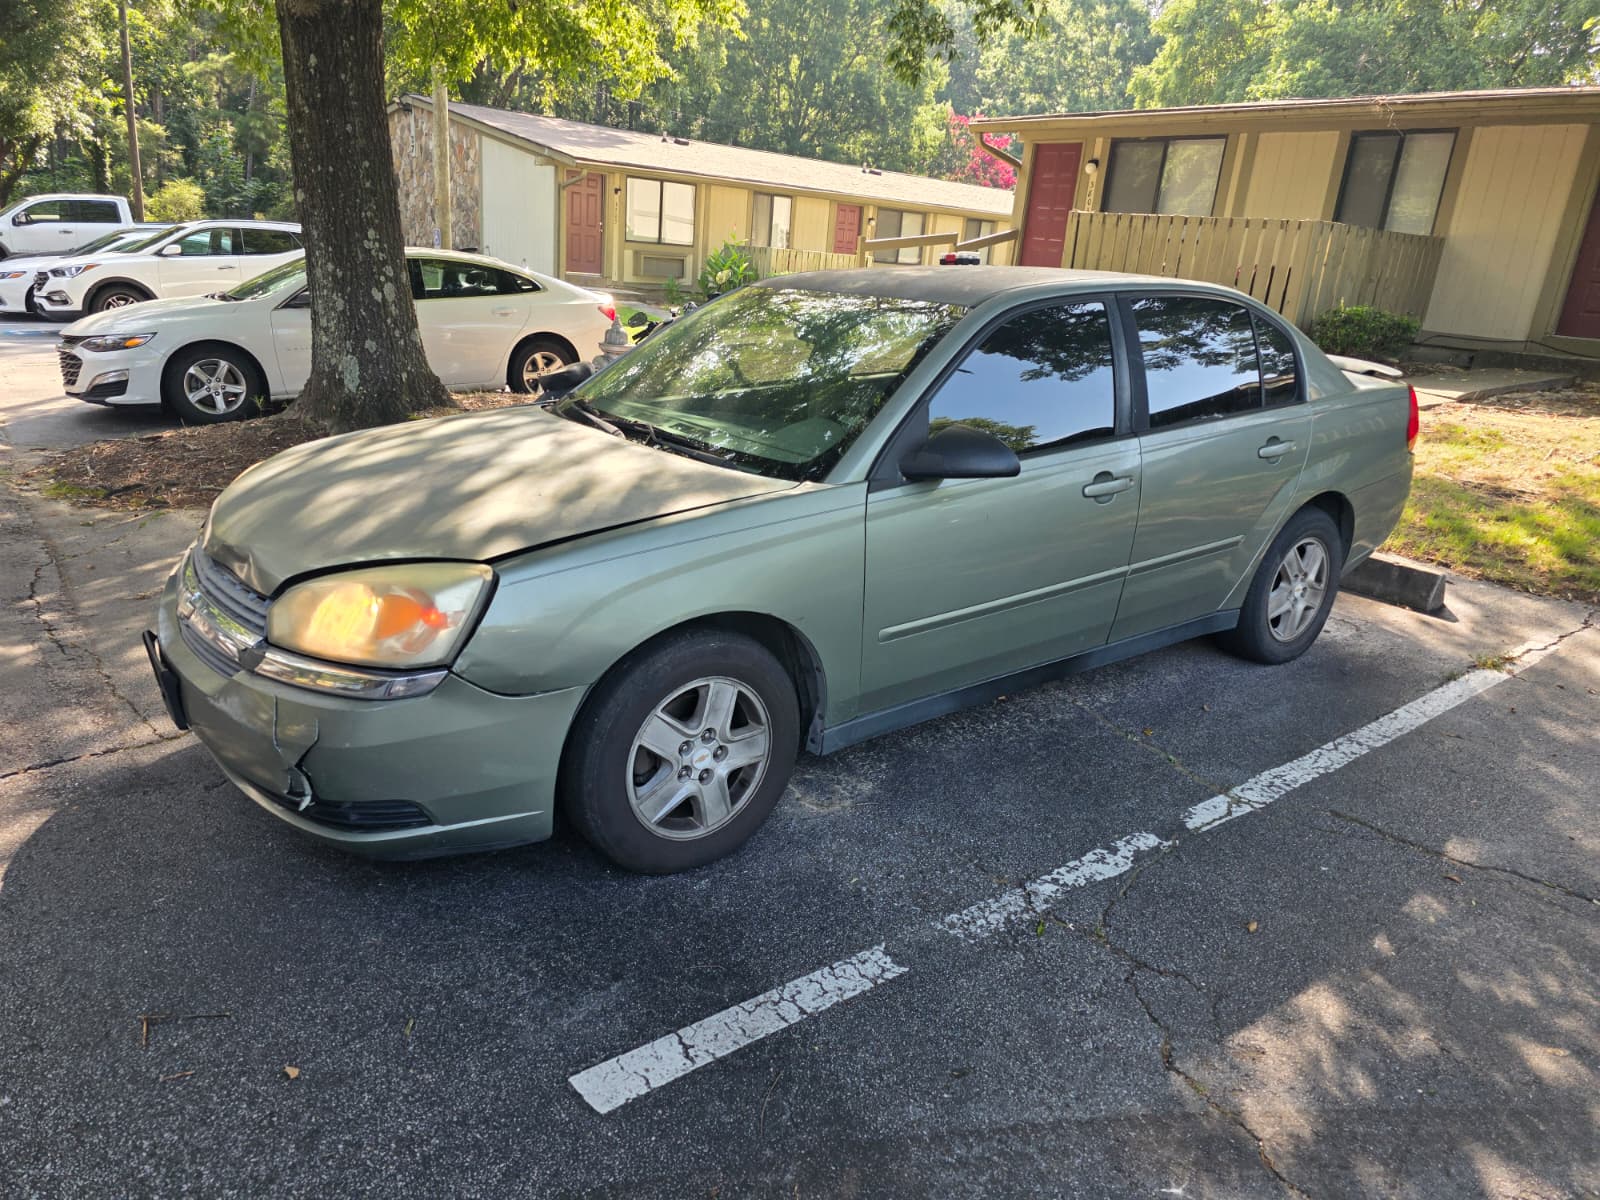
How to repair plastic bumpers at home?

5Answers
StJace
06/18/2026, 01:09:33 AM

Repairing a plastic bumper at home is a cost-effective and achievable DIY project, typically saving you 75% or more compared to professional repair costs. Success depends on correctly identifying the bumper material and following a structured process of cleaning, reinforcing, filling, and painting. For common cracks, a combination of backing reinforcement with epoxy/staples and surface filling yields durable results. Minor dents can often be reshaped using heat.

Critical First Step: Identify Your Bumper Plastic Most modern bumpers are made from thermoplastics like Polypropylene (PP) or Polyethylene (PE), which can be reshaped with heat. Using the wrong repair products on these materials is the leading cause of failed DIY repairs. Check the back of the bumper for recycling symbols (e.g., > PP < , > PE < ) or use a simple test: sand a hidden area—if it produces dusty powder, it’s likely a thermoplastic; if it produces stringy strands, it’s a thermoset.

Core Repair Process for Cracks The goal is to restore both structure and appearance. Working with the bumper removed is highly recommended for best access and results.

  1. Preparation & Alignment: Thoroughly clean the area with soapy water and a degreaser. Sand around the crack with 120-grit sandpaper to create a rough surface for adhesion. Use strong tape (like aluminum body tape) on the front side to pull and hold the crack tightly closed.

  2. Structural Reinforcement (Back Side): This is the most crucial step for longevity. Flip the bumper. Apply a two-part plastic-specific epoxy adhesive along the crack. For added strength, especially on longer cracks, use a soldering iron to melt-in plastic “staples” or a piece of fiberglass mesh into the bumper material and epoxy, effectively creating a welded bridge across the crack.

  3. Surface Filling & Smoothing (Front Side): Remove the front tape once the rear epoxy sets. Sand the repaired area. Apply a flexible plastic body filler designed for bumpers (standard body filler will crack). Feather the edges sanding with progressively finer grits (180 to 400) until perfectly smooth with the surrounding area.

  4. Priming & Painting: Wipe with a tack cloth. Apply several light coats of plastic adhesion promoter, followed by primer. After sanding the primer smooth with 600-grit, apply color-matched spray paint in thin, even coats, finishing with clear coat for protection and gloss.

Alternative Method for Dents For dents without cracks, heat is your primary tool. Use a heat gun or even boiling water poured carefully over the area to make the plastic pliable. From behind, use a gloved hand, a rubber mallet, or a rounded tool to gently push/pop the dent back to its original shape. Avoid overheating to prevent melting.

Material Selection Guide Using compatible materials is non-negotiable for a lasting repair.

Repair StageRecommended Product TypeKey Purpose & Note
AdhesiveTwo-part epoxy for flexible plastics (PP, PE)Bonds and provides foundational strength. Must specify “for polypropylene/polyethylene”.
FillerFlexible bumper/plastic body fillerSands smoothly and flexes with the bumper without cracking.
Primer/PaintAdhesion promoter, automotive primer, flexible top coat & clear coatEnsures paint bonds properly and remains flexible to resist chipping.

Essential Tips for Success Always work in a well-ventilated area and wear appropriate PPE (mask, goggles, gloves). Patience during sanding and painting stages directly determines the final appearance. For color matching, your vehicle’s paint code (found on the driver’s side door jamb or VIN sticker) is essential for purchasing accurate spray paint. A high-quality repair can last for years, but severe structural damage or large, shattered areas may still require professional assessment.

Was this review help?
163
Share
DeDaniela
06/18/2026, 01:19:22 AM

I’ve fixed a few bumpers on my own cars. The biggest lesson? Don’t skip the prep. That cleaning and sanding step feels tedious, but if you don’t get all the dirt and wax off, nothing sticks right. My go-to move for a hairline crack is the soldering iron trick. I just use a cheap iron to melt little plastic “welds” across the back of the crack before I add any glue. It takes an extra ten minutes but makes the repair rock solid. Also, when you’re pushing out a dent with heat, go slow. It’s better to warm it, push a little, and reheat than to melt a hole by holding the heat gun in one spot too long.

Was this review help?
15
Share
Expand All
VanJaxon
06/18/2026, 01:28:59 AM

I was really nervous to try this, thinking I’d make my bumper look worse. But following the main steps carefully, it worked! The moment of truth was using the heat gun on a dent. I warmed it gradually in circles, and when the plastic got soft, I reached behind and it just popped right out with a gentle push from my thumb. It was incredibly satisfying. For the painting part, I took my time with the primer sanding. I used a spray can of my exact car color from an auto parts store, using the paint code from my door. It’s not a perfect showroom match in every light, but you have to look really close to tell it was ever damaged. The whole project cost me about $60 in supplies versus a $400 repair quote.

Was this review help?
15
Share
Expand All
MacElisa
06/18/2026, 01:33:43 AM

Let’s talk cost and practicality. A shop will charge $300-$800 for a bumper repair and repaint. A DIY fix costs $50-$150 for a quality kit, filler, adhesion promoter, and color-matched spray cans. That’s a massive saving. The real value is for those older cars where a minor bumper scrape isn’t worth a huge insurance claim or repair bill. You’re not aiming for concours perfection; you’re aiming to make the damage disappear from 5 feet away and protect the bumper from rust or further cracking. For that goal, a home repair is more than sufficient. Just invest in the right flexible materials—don’t use regular body filler from the hardware store.

Was this review help?
29
Share
Expand All
ColeLee
06/18/2026, 01:42:40 AM

The difference between an okay repair and a great one is in the finishing. Everyone focuses on the glue and the filler, but the paintwork is what everyone sees. After you’ve sanded the filler flawlessly smooth, don’t just start spraying color. You must use an adhesion promoter. It’s a special primer for plastics that creates a chemical bond; without it, the paint will eventually peel or chip off. Then, use a high-build primer, spray it, and sand it again with very fine grit (like 600) until the surface feels like glass. When spraying the color and clear coat, use multiple light, misting coats instead of one heavy coat that runs. Allow proper drying time between each step. This patience is what makes the repair virtually invisible.

Was this review help?
17
Share
Expand All
More Q&A

How to Start a Manual Transmission Car Correctly?

Press the clutch pedal and shift the gear lever into first gear. Sound the horn and release the handbrake. Gradually release the clutch pedal while gently pressing the accelerator pedal. When the clutch pressure plate begins to engage with the driven plate, pause the clutch pedal at this position momentarily. Once the car starts moving smoothly, continue to slowly release the clutch pedal completely.
106
Share

Does Subaru Have Domestic Models?

Subaru does not have domestically produced models. Subaru is a Japanese automobile manufacturing company founded in 1953, with its headquarters located in Tokyo, Japan. The Subaru logo features six stars, symbolizing the five independent companies that came together to form the present-day Subaru. Subaru vehicles are known for their unique technologies, particularly the horizontally opposed engine and the full-time all-wheel-drive system. Fuji Heavy Industries has continuously developed distinctive all-wheel-drive systems and high-performance horizontally opposed engines. Over the years, their all-wheel-drive system has been refined and improved through rigorous road conditions worldwide, enhancing both performance and quality.
102
Share

Function and Composition of the Cooling System?

The functions of the cooling system are as follows: 1. Adjust the cooling intensity according to the engine's load, speed, and temperature changes to ensure rapid warm-up and maintenance of normal operating temperature. 2. Provide different cooling intensities to various parts of the engine, dissipate the heat generated during engine operation into the air, and ensure the engine operates within the optimal temperature range. 3. The cooling system must prevent both engine overheating and excessive cooling during winter. Components of the cooling system: thermostat, water pump, water pump belt, radiator, cooling fan, water temperature sensor, liquid storage tank, heating device, expansion tank, water jackets in the engine block and cylinder head, and other additional components.
109
Share

What does insurance salvage value vehicle mean?

Insurance salvage value vehicle refers to the remaining usable value of an insured vehicle after it has been damaged in an accident. Below is relevant information: Influencing factors: A vehicle's salvage value is affected by many factors, such as the vehicle's brand, market recognition, usage duration, mileage, etc. Generally, the longer a vehicle has been used, the lower its ratio in salvage value calculation. Insurance value: Insurance value is the agreed value of the subject matter insured as stipulated in the insurance contract by both parties. The determination of insurance amount is based on the determination of insurance value.
116
Share

Is the GM L2B engine based on Suzuki technology?

General Motors' L2B engine utilizes Suzuki technology. The 1.5L naturally aspirated engine installed in the Cavalier is the L2B engine, which delivers a maximum power output of 83kW and peak torque of 141N·m. The engine reaches its maximum power at 6,000 rpm and achieves peak torque at 4,000 rpm. This powerplant incorporates DVVT technology and features an aluminum cylinder head with a cast iron cylinder block. The Cavalier's front fascia adopts Chevrolet's signature dual-layer grille design with innovative wind-blade gradient textures, injecting more dynamism compared to current Chevrolet models.
101
Share

Is SWM a Joint Venture?

SWM is not a joint venture car, but a domestic brand. This brand has many SUV models, including G01, X3, G05, X7, etc. The first SUV model under SWM, the SWM X7, was launched in Chongqing, targeting the mid-to-large seven-seat SUV market with a total of 6 variants. The SWM X7 is a mid-size SUV, equipped with two engines: a 1.8-liter naturally aspirated engine with 137 horsepower and 185 Nm of maximum torque, and a 1.5-liter turbocharged engine with 156 horsepower and 230 Nm of maximum torque.
118
Share
Cookie
Cookie Settings
© 2025 Servanan International Pte. Ltd.