···
Log in / Register

how to change car front light bulb

5Answers
JoshuaFitz
12/20/2025, 03:34:28 PM

Replacing a car's front light bulb is a common DIY task that can save you a significant amount of money on labor costs. The core process involves accessing the bulb from behind the headlight assembly, disconnecting the electrical connector, releasing the old bulb, and installing the new one. However, the specific steps vary greatly depending on your car's make and model. The most critical step is always to consult your vehicle's owner's manual first for model-specific instructions and safety warnings.

Before you begin, gather the necessary items. You'll need a replacement bulb (confirm the correct part number in your manual or at an auto parts store), protective gloves (to prevent skin oils from damaging the glass of halogen bulbs), and potentially a set of screwdrivers or sockets. Park your car on a level surface, turn off the engine, and engage the parking brake.

Safety is paramount. Never touch the glass part of a halogen bulb with your bare hands; the oils can create hot spots and cause the bulb to fail prematurely. Also, allow the headlights to cool completely if they were recently on to avoid burns.

Here’s a general step-by-step guide:

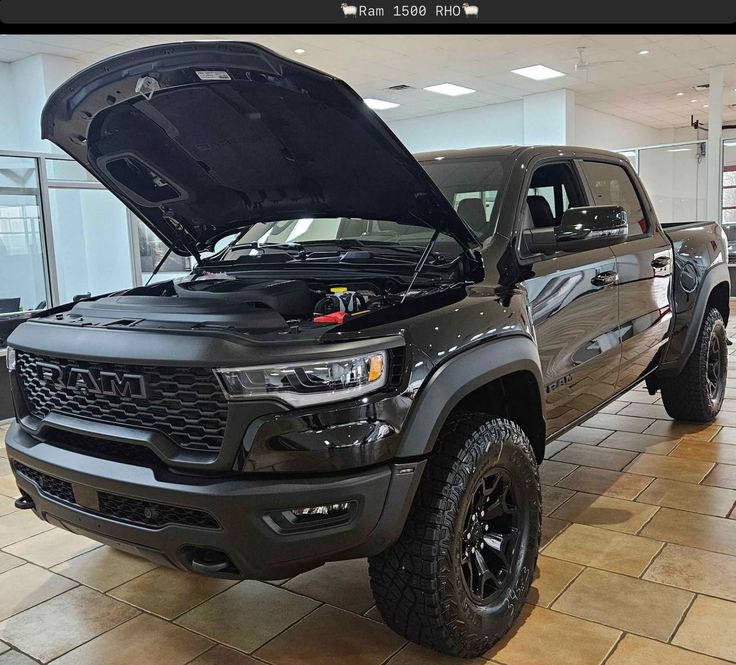
  1. Access the Bulb: Open the hood and locate the back of the headlight assembly. You may need to remove a dust cover, which typically twists off. Some cars require removing the battery or washer fluid reservoir for enough space to work.
  2. Disconnect the Wiring: Unplug the electrical connector from the back of the bulb. This usually involves pressing a small clip or tab and pulling straight back.
  3. Release the Old Bulb: The bulb is held in place by a metal clip or a plastic retaining ring. Carefully release this mechanism. For bulbs that twist-in, turn them counterclockwise to unlock.
  4. Install the New Bulb: Without touching the glass, insert the new bulb into the socket. Re-secure the clip or ring, and reconnect the electrical connector. Ensure the new bulb is seated exactly as the old one was.
  5. Test and Reassemble: Before putting everything back together, turn on the headlights to test the new bulb. If it works, reattach the dust cover and close the hood.

If you encounter excessive rust, broken clips, or the process seems overly complex for your vehicle, it's wise to consult a professional mechanic.

ConsiderationDetailsNote
Bulb TypeHalogen, HID (Xenon), LEDHID and LED assemblies are often more complex; DIY replacement may not be advised.
Average Cost (Bulb Only)$15 - $100Price varies significantly by technology (Halogen is cheapest, LED is most expensive).
Labor Time (Professional)0.5 - 1.0 hourSome cars are designed for easy access, while others require bumper removal.
Common Tool NeedsScrewdrivers, sockets, glovesMost jobs require only basic tools.
Critical Safety StepWear gloves, ensure ignition is off.Prevents bulb damage and electrical shock.
Was this review help?
116
Share
StMaximus
12/28/2025, 07:19:27 PM

Honestly, the hardest part is just figuring out how to get your hands in there. My advice? Look it up on YouTube first. Seriously, type in your car's exact year, make, and model plus "headlight replacement." Watch someone else do it for your specific car. You'll see if you need to take out the battery or anything tricky. Saves a ton of frustration. Just remember to wear gloves if you're dealing with the standard halogen bulbs.

Was this review help?
4
Share
Expand All
XavierDella
01/05/2026, 04:04:21 AM

I was nervous the first time I tried this, thinking I'd break something. But it's usually straightforward. The key is to be gentle and patient. Don't force any connectors or clips. After you get the old bulb out, take a second to look at how it's positioned before you put the new one in. That way, you know the new bulb goes in the same way. The feeling of getting it right and saving sixty bucks on a mechanic is fantastic.

Was this review help?
5
Share
Expand All
MacKinsley
01/12/2026, 04:01:10 PM

It’s all about the prep. Get the right bulb from the auto parts store—they can look it up for you. Make sure you have a clean, well-lit workspace. The most common mistake is rushing. Take photos with your phone as you disassemble things; it’s a lifesaver when you’re putting it all back together. This isn't a race. A careful, methodical approach is what separates a successful DIY job from a trip to the repair shop.

Was this review help?
7
Share
Expand All
BrielleRose
01/19/2026, 01:25:26 PM

Focus on the connector and the clip. Once you get the dust cover off, you'll see a plug with wires. Press the tab and pull that off. Then, you'll see a small wire or plastic clip holding the bulb itself. Gently flip that clip up or to the side. The bulb should then be free to come out. Reverse the process for the new one. The main goal is to avoid twisting or forcing anything that doesn't want to move. If there's major resistance, you've probably missed a step.

Was this review help?
12
Share
Expand All
More Q&A

What are the differences between the Passat Government Procurement Edition and the Premium Edition?

The differences between the Passat Government Procurement Edition and the Premium Edition are: 1. Different powertrains: The Passat Government Procurement Edition is equipped with a 1.8L naturally aspirated engine, with a maximum power of 118kW and a maximum horsepower of 160PS; the Premium Edition is equipped with a 1.4T turbocharged engine, with a maximum power of 110kW and a maximum horsepower of 150PS. 2. Different curb weights: The Passat Government Procurement Edition has a curb weight of 1520kg; the Premium Edition has a curb weight of 1495kg. Both the Passat Government Procurement Edition and the Premium Edition have the same body dimensions: length 4872mm, width 1834mm, height 1484mm, and a wheelbase of 2803mm.
113
Share

What is the difference between the Corolla Sport and Elite editions?

The difference between the Corolla Sport and Elite editions lies in their powertrains: The Corolla Sport edition is equipped with a 1.2T turbocharged engine, delivering a maximum power of 85kW and a maximum torque of 185Nm; the Elite edition comes with a 1.5L naturally aspirated engine, producing a maximum power of 89kW and a maximum torque of 148Nm. More details are as follows: 1. Both the Corolla Sport and Elite editions share the same body dimensions: length 4635mm, width 1780mm, height 1435mm, with a wheelbase of 2700mm. 2. Both models feature a fuel tank capacity of 50L, a trunk capacity of 470L, a curb weight of 1330kg, and a body structure of a 4-door, 5-seater sedan.
105
Share

What are the classifications of oxygen sensors?

Here is an introduction to the classifications of oxygen sensors: 1. Conventional oxygen sensors: There are mainly two types of oxygen sensors used in automobiles - zirconia type and titania type. Both types of oxygen sensors can be further divided into heated and unheated versions, with heated versions being more commonly used in vehicles. 2. Air-fuel ratio sensor: The air-fuel ratio sensor can continuously detect the air-fuel ratio across the entire range from rich to lean mixtures. Compared to conventional oxygen sensors, this type of sensor enables feedback control of the air-fuel ratio throughout the entire operating range of the engine, achieving optimal fuel consumption, emissions, and performance in all operating regions. In the air-fuel ratio feedback control systems for lean-burn engines, lean-burn sensors are employed. These sensors can continuously measure the air-fuel ratio in extremely lean mixture conditions, enabling feedback control in lean-burn conditions. 3. Nitrogen oxide sensor: The nitrogen oxide sensor is used to identify and verify the proper functioning of the three-way catalytic converter.
105
Share

How to Adjust the Rearview Mirrors on a Citroën?

Before reversing into a parking space, it is essential to adjust the rearview mirrors properly on a Citroën. Whether it's the left or right side mirrors or the interior rearview mirror, ensure that when the driver is in the normal driving position, the horizon is at the midpoint of the mirror's height. Additionally, the side mirrors should show no more than one-quarter of the car's body. The specific adjustment methods are as follows: 1. First, adjust the right rearview mirror. Make sure the top of the mirror shows the rear door handle, with the front door handle positioned in the middle of the mirror. The car's body should occupy no more than one-quarter of the mirror's surface—the less, the better in principle, but too little may cause the ground lines to appear uneven in width compared to the left mirror. 2. The left rearview mirror should be adjusted similarly to the right one, ensuring that the position of the left rear wheel is visible during parallel parking.
104
Share

Should the Clutch Be Depressed When Decelerating in Subject 3?

Whether to depress the clutch when decelerating in Subject 3 depends on the vehicle speed. If the vehicle is in 3rd gear or higher and moving at a relatively high speed, the student does not need to depress the clutch. Instead, they should use the "tap braking" method, which involves pressing and releasing the brake pedal intermittently. If the vehicle has slowed down and is in 2nd or 1st gear, and the engine power begins to feel insufficient, not depressing the clutch while braking will cause the engine to stall. Therefore, in this situation, both the brake and clutch pedals should be depressed simultaneously. Requirements for different road sections: 1. Normal road sections: On flat roads with light traffic, if the vehicle speed is above 30km/h and only a brief brake application is needed, gently tapping the brake pedal is sufficient, and there is no need to depress the clutch pedal. 2. Special road sections: When passing through bus stops, school zones, or traffic light intersections, the vehicle should be shifted into a lower gear, and both the clutch and brake pedals should be depressed simultaneously.
120
Share

How often should the air filter of Volkswagen Tiguan be replaced?

Tiguan's air filter manufacturer recommends a replacement cycle of 25,000 kilometers or 36 months. If the car is used in areas with severe haze, the replacement cycle can be shortened. After a period of use, the activated carbon filtration function of the air filter will decrease, and you can purchase an appropriate air filter from the auto parts market for replacement. The method for replacing the air filter of Tiguan is as follows: 1. Open the passenger door and enter the cockpit to find the glove box. 2. Open the glove box, and you can see the buckle of the glove box from below. Disconnect the damping rod buckle and separate it. Then separate the upper limit buckle to remove the glove box. 3. Open the air filter cover and take out the original air filter. 4. Finally, replace it with a new air filter and reattach the removed cover.
116
Share
Cookie
Cookie Settings
© 2025 Servanan International Pte. Ltd.