···
Log in / Register

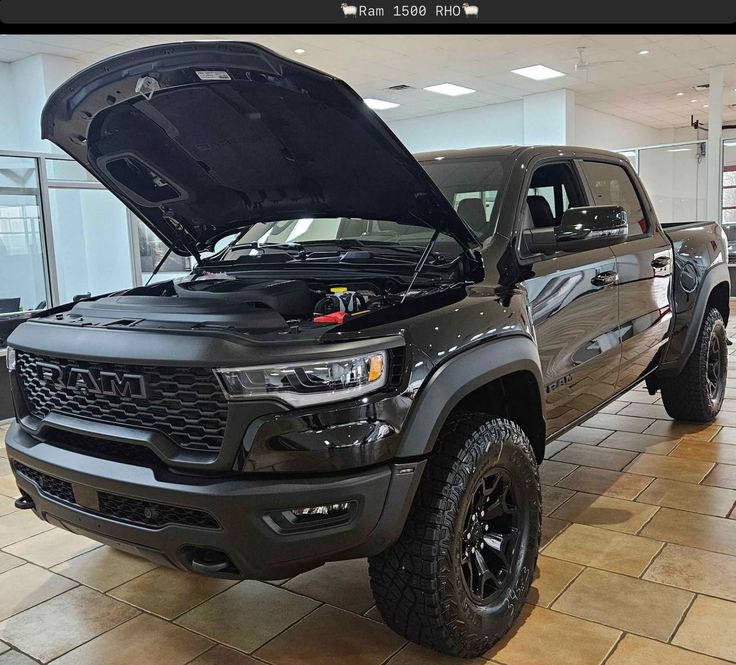
How to Open the Car Front Hood?

6Answers
LaPiper
07/29/2025, 05:57:14 AM

Here are the steps to open the car front hood: 1. The hood release lever is located under the left side of the dashboard, near the driver's knee area when seated in the driving position. Gently pull the hood release lever, and the hood will pop open slightly. 2. Reach into the gap and locate the secondary release latch inside. Pull it upward to fully open the hood. Here is some relevant information about the hood: 1. Airflow management. For high-speed moving objects, the air resistance and turbulence generated around the object directly affect its trajectory and speed. The hood's design effectively adjusts the airflow direction relative to the car's movement and reduces the resistance force, minimizing the impact of airflow on the vehicle. 2. Protection for the engine and surrounding components. By enhancing the hood's strength and structure, it can effectively prevent adverse effects such as impacts, corrosion, rainwater, and electrical interference, ensuring the vehicle's normal operation.

Was this review help?
115
Share
OBrady
08/13/2025, 08:12:59 AM

As an experienced driver who has driven for many years, let me share some tips: opening the hood is actually not difficult. The first step is to sit in the driver's seat and close the door. The hood release lever is usually hidden under the left side of the steering wheel or near the door, and it's a small plastic handle. Pull it firmly toward yourself, and you'll hear a slight 'pop' sound as the hood releases. Then, exit the car carefully to avoid hitting anything, and walk to the front of the vehicle. There's also a safety latch under the center of the hood to prevent accidental opening. Reach under and feel for a small hook or lever, then press it down or push it to the side. At this point, the hood will be fully open—lift it with your hand and secure it with the support rod. When closing, gently lower the hood and press it down to lock it. It's recommended to do this on a flat surface to avoid pinching your fingers. Different car models vary significantly; for example, Japanese cars often have lower button placements. Try it a few times the first time, and you'll get the hang of it quickly. Always prioritize safety first.

Was this review help?
9
Share
Expand All
VeraLee
10/06/2025, 10:05:02 PM

When I first started driving, I was a bit confused, but after my friend taught me, I got it: to open the hood, you need to start from inside the car. After settling into the driver's seat, look for the pull cord or handle on the left side—the location varies by car and might be near the dashboard. Pull it to unlock the hood. Then, get out and go to the front of the car. There’s a small latch under the hood, often called the secondary release. Reach in and gently push or slide it open, then you can lift the hood and prop it up. Move slowly to avoid hurting your hands by applying too much force. When closing the hood, first secure the support rod and then lower it gently. Common mistakes include not pulling the lever far enough or failing to locate the latch, which prevents the hood from opening. Practice a few times to get the hang of it, and new drivers should especially read the manual to avoid accidents. Overall, it’s pretty simple—once you form the habit, you’ll do it well.

Was this review help?
5
Share
Expand All
VanTanner
11/19/2025, 10:28:34 PM

As someone who frequently works on cars, here's my recommended procedure: Enter the driver's seat and locate the release mechanism, usually a pull handle on the lower left side. Pull it to pop the hood. Exit the vehicle and find the primary latch at the front, then push or pull it to release. Lift the hood and secure the support rod. When closing, ensure it's properly latched.

Was this review help?
18
Share
Expand All
LailaAnn
01/10/2026, 12:04:53 AM

Safety first! Turn off the engine and engage the handbrake before opening the hood. Then locate the release lever inside the cabin, typically positioned near the door. Pull it to loosen the hood. Exit the vehicle and move to the front, operate the central latch to release the hood. Slowly lift it and secure with the support rod. Always check stability before working. Common issues include stuck hoods or improper alignment - pay attention to details.

Was this review help?
3
Share
Expand All
VanHarley
04/06/2026, 04:47:18 AM

Easy Hood Operation: First pull the small lever under the steering wheel from inside the car. After hearing the pop sound, walk to the front. There's a latch under the hood center seam - just flip it open. Lift and secure. To close, simply press down. Structures may vary across vehicles (e.g. older models may require an extra step). Simple operation, just avoid rushing during first attempts.

Was this review help?
4
Share
Expand All
More Q&A

What to Do When a 4S Shop Sells You a Display Car Instead of a New One?

There is sufficient evidence to prove that the dealer sold a display car to the consumer. For example, you can check the VIN on the insurance policy or seek identification from relevant professional departments. If negotiations with the dealer fail, the consumer can file a complaint with the local consumer rights protection agency and the local industrial and commercial department. If mediation fails or the dealer does not provide a satisfactory response to the consumer, the consumer can file a lawsuit in court.
116
Share

What are the solutions for reversing camera lag?

Reversing cameras are indeed quite useful, as they can effectively assist with visibility, allowing for smooth maneuvering during reversing. To completely eliminate these issues with the reversing camera, it's better to replace it with a higher-end model.
113
Share

What is the wading depth of the Lynk & Co 01?

The wading depth of the Lynk & Co 01 is 50cm. Here is an extended introduction: Suspension introduction: The Lynk & Co 01 adopts a long-travel front MacPherson and rear multi-link design with an anti-roll bar, ensuring the suspension's support. The larger rear wheel camber angle further enhances the vehicle's stability and sporty performance. In terms of configuration: The Lynk & Co 01 is equipped with the world's first Bosch ESP9.3 high-dynamic version, which includes nearly 40 sub-functions, including the TSA Trailer Stability Assist system. It can determine the vehicle's driving status based on data such as vehicle speed, steering angle, and yaw rate, and prevent vehicle sway by selectively braking individual wheels.
106
Share

What are the dimensions of the Mercedes-Benz E-Class?

The body dimensions of the Mercedes-Benz E-Class are 5021x1854x1487mm, with a wheelbase of 3014mm. Additional information: Introduction: The Mercedes-Benz E-Class is a mid-to-large-sized high-end business sedan, sports car, and station wagon developed by Mercedes-Benz, positioned between the C-Class and S-Class. The recognized ancestor of the E-Class is the 1947 Mercedes 170, one of the first models developed by Mercedes after the war. Highlights: Compared to the 170s of the same era, the 170 had less exterior decoration and further simplified equipment. The new Mercedes-Benz E-Class is different from before, with the new E-Class divided into two major series: the sports sedan and the sedan, and the entire lineup has been updated with more fuel-efficient and powerful turbocharged engines.
107
Share

How to self-adjust inner tire wear on rear wheels?

Adjust tire pressure to always maintain normal levels. Regularly perform wheel dynamic balance tests, and install balancing weights if imbalance is detected; check if wheel hub bolts are loose. Pay attention to tire maintenance and rotation, preferably rotating tires every 5,000 kilometers. Regularly visit professional repair shops for four-wheel alignment to ensure accurate vehicle alignment data. Avoid overloading and maintain balanced tire load distribution. Avoid long-term parking on uneven surfaces.
117
Share

What are the steps for Subject 2 simulator training?

Be sure to accurately observe the reference points and lines, and monitor the distance between the car body and the lines through the rearview mirror. When parallel to the garage, pay attention to the distance of the car body to avoid crossing the lines, and be cautious not to hit the garage corner when exiting; remember to turn on the turn signal when exiting the garage. Focus on finding the correct distance between the right wheel and the right edge line, as well as the parking position, to avoid point deductions. Try to drive close to the outer curve and constantly check the distance between the rear of the car and the edge line.
107
Share
Cookie
Cookie Settings
© 2025 Servanan International Pte. Ltd.